
If you’ve ever walked through a plant nursery and felt that familiar pang of wanting just one more snake plant, I’ve got some wonderful news for you: you might never need to buy another one again.
Snake plants, those gorgeous, sword-leaved survivors that seem to thrive on neglect, have a secret superpower, they can multiply themselves. With the right nudge and a few strategic tweaks to their care routine, your single Sansevieria can become a mother plant to dozens of babies, or “pups,” giving you an endless supply of greenery to fill your home or share with friends.
I’ve spent years experimenting with these resilient beauties, and what I’ve learned is that getting snake plants to produce pups isn’t about luck, it’s about understanding what they need and creating the perfect conditions to trigger their natural reproductive instincts.
In this comprehensive guide, I’ll walk you through everything you need to know to transform your lone snake plant into a thriving family. We’ll cover the science behind pup production, the exact steps to encourage it, troubleshooting tips when things don’t go as planned, and how to care for those precious baby plants once they arrive.
Ready to become a snake plant propagation expert? Let’s dive in.
Understanding Snake Plant Pups: Your Plant’s Natural Cloning System
Before we get into the how-to, it’s important to understand what we’re actually talking about when we say “pups.”
Snake plant pups are genetically identical offshoots that emerge from the parent plant’s underground rhizome system. Think of rhizomes as horizontal stems that grow beneath the soil surface, sending out roots downward and new shoots upward. When conditions are right, these rhizomes produce what are essentially clones of the mother plant—baby snake plants with the same variegation patterns, leaf shape, and growth habits.
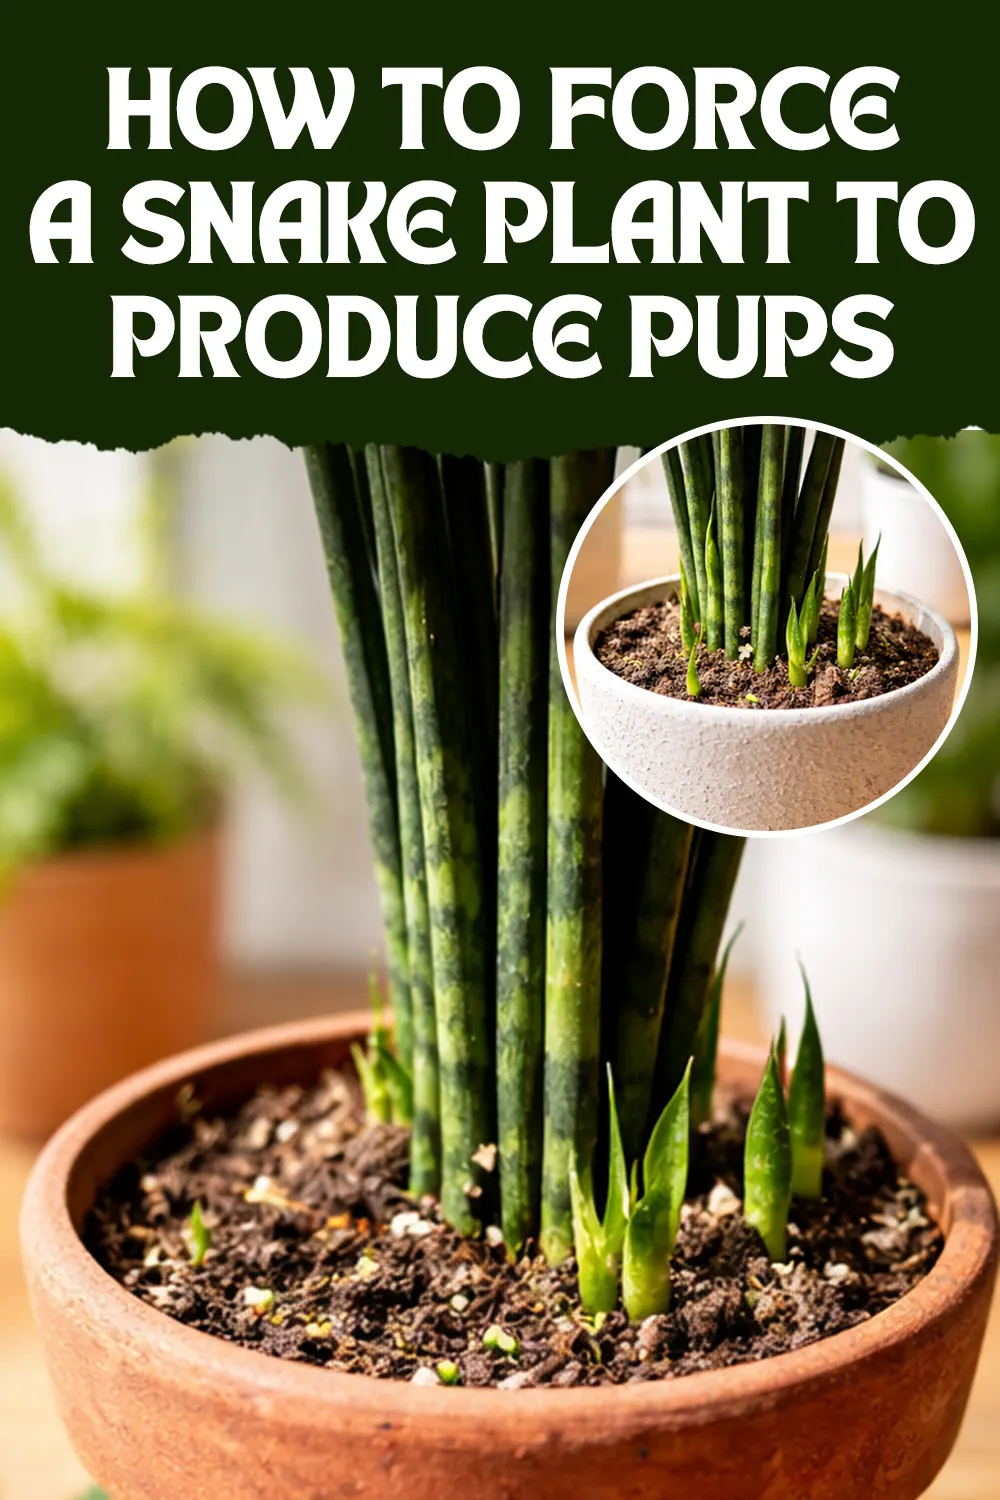
These pups typically emerge from the soil near the base of the parent plant, starting as small, tightly-rolled shoots that gradually unfurl into miniature versions of the adult leaves. Some gardeners describe the experience as magical, one day your pot seems perfectly normal, and the next, you spot a tiny green sword poking through the soil.
Here’s what makes this even better: unlike propagating snake plants from leaf cuttings (which can result in loss of variegation in some varieties), pups retain all the beautiful characteristics of the mother plant. If your parent has gorgeous yellow margins, the pups will too.
But here’s the thing many plant parents don’t realize: while snake plants can produce pups naturally, they often won’t unless conditions push them to do so. In their native habitat of West Africa, snake plants multiply as a survival strategy, spreading their genetic material when resources shift or when they’ve outgrown their current space.
The good news? We can recreate these triggers indoors.
What Actually Triggers Pup Production? The Science Behind the Strategy
Snake plants are incredibly adaptable survivors, and their reproductive behavior reflects this. In nature, they’ve evolved to multiply when certain environmental cues signal that it’s time to spread and colonize new territory.
Understanding these triggers is the key to manipulating your indoor growing conditions to encourage pup production. Here are the main factors at play:
Rhizome Maturity and Health
The rhizome system is the powerhouse behind pup production. Young plants with underdeveloped rhizomes simply don’t have the energy reserves or structural capacity to produce offshoots. A mature snake plant, typically one that’s been growing for at least 1-2 years, will have developed a robust network of thick, fleshy rhizomes that can support new growth.
Think of it like this: the rhizome is the plant’s storage bank. It needs to have enough reserves (water, nutrients, energy) to not only sustain itself but also invest in creating new plants. A healthy, well-established rhizome system is your foundation for success.
Strategic Stress Responses
This might sound counterintuitive, but plants often reproduce when they experience mild stress. It’s a survival mechanism, when a plant senses that its current situation might be changing or challenging, it prioritizes reproduction to ensure its genes survive.
For snake plants, this can mean becoming slightly rootbound (but not severely so), experiencing a period of reduced water, or having some leaves removed. The key word here is strategic, we’re talking about calculated, mild stress, not neglect or abuse.
Light Availability
While snake plants have a reputation for tolerating low light, they need significantly more light to produce pups. Light is energy, and creating new plants requires a lot of it. When a snake plant receives bright, indirect light for several hours a day, it has the energy surplus needed to invest in reproduction rather than just survival.
Think of low light as maintenance mode, the plant conserves energy and focuses on simply staying alive. Bright, indirect light is growth mode, the plant can afford to expand and multiply.
Space for Expansion
This is where pot size comes into play, and it’s a delicate balance. Snake plants like being somewhat snug in their pots, it creates that slight rootbound stress that can trigger pupping. However, if they become too cramped with absolutely no room for rhizomes to spread horizontally, pup production stops entirely.
The sweet spot is a pot that allows the rhizomes just enough room to send out new shoots sideways while still maintaining that slightly crowded feeling.
Nutrient Availability and Water Cycles
Finally, the plant needs adequate nutrition and a proper watering cycle to support new growth. The rhizomes need nutrients to build new plant tissue, and the soak-and-dry watering method stimulates root activity, encouraging the rhizome system to actively grow and branch out.
Now that you understand the “why,” let’s get into the “how.”
Step-by-Step: Your Complete Guide to Forcing Snake Plant Pup Production
Step 1: Start With the Right Parent Plant
Not all snake plants are created equal when it comes to pup production potential. Your success starts with choosing the right mother plant.
What to look for:
- Maturity: The plant should be at least 1-2 years old. Young plants from the nursery might look healthy, but their rhizome systems haven’t developed enough yet. If you’re not sure of the age, look for a plant that has multiple leaves and appears well-established.
- Health indicators: Choose a plant with thick, upright leaves that feel firm and succulent to the touch. The leaves should have vibrant color (whether solid green or variegated) with no yellowing, browning, or mushy spots.
- Root system: If possible, peek at the drainage holes or gently lift the plant to check the roots. You want to see white or light tan roots that look plump and healthy, not black, mushy, or dried out.
- Existing rhizome development: When you eventually repot (which we’ll get to), you’ll want to see thick, white or pale-colored rhizomes that feel firm. These are your pup-producing engines.
Pro tip: If you’re shopping for a new plant specifically to propagate, ask the nursery staff about the plant’s age and whether it’s ever produced pups before. Some varieties are more prolific pup-producers than others.
Step 2: Time Your Repotting Perfectly
Repotting is one of your most powerful tools for triggering pup production, but timing and technique matter enormously.
When to repot:
The best time is early spring, right as the plant is entering its active growing season. This gives it the entire warm season to establish in its new pot and start producing pups. That said, if you’re in a warm climate or have indoor grow lights, late spring or early summer works too.
Choosing the right pot:
This is crucial. You want to go up in size, but not dramatically. Select a pot that’s only 1-2 inches wider in diameter than the current one. Going too large can actually inhibit pup production because the plant focuses all its energy on establishing roots in the new space rather than reproducing.
The pot absolutely must have drainage holes. I cannot stress this enough. Snake plants are incredibly susceptible to root rot, and without proper drainage, you’ll lose the entire plant long before you see any pups.
Material matters:
Terra cotta pots are fantastic for snake plants because they’re porous and allow excess moisture to evaporate through the walls. Ceramic with drainage works too. Plastic is fine if you’re very careful about watering. Avoid decorative pots without drainage unless you’re using them as cache pots with a nursery pot inside.
The repotting process:
- Water your plant lightly a day or two before repotting, this makes it easier to remove from the pot without damaging roots.
- Gently tip the pot and slide the plant out. If it’s stuck, run a knife around the inside edge or tap the bottom of the pot.
- Examine the rhizomes and roots. This is your chance to see what you’re working with. Healthy rhizomes are thick, pale, and firm.
- Gently loosen the root ball with your fingers, especially if it’s very compacted. This disturbance actually helps stimulate new growth.
- Place a small amount of fresh soil in the new pot, position the plant at the same depth it was before, and fill in around the sides with more soil.
- Water lightly to settle the soil, but don’t saturate it.
Step 3: Master the Soil Mix Formula
The right soil mix is non-negotiable for pup production. Snake plants need a growing medium that drains quickly while still providing some nutrient retention and root support.
The ideal formula:
- 2 parts cactus or succulent soil: This provides the base with some nutrients while being lighter than regular potting soil
- 1 part perlite or pumice: These create air pockets and prevent compaction
- Optional additions: A small scoop of coarse sand (for extra drainage) or a handful of orchid bark (for aeration)
Why this matters:
When rhizomes sit in soggy soil, they rot instead of producing pups. The well-draining mix keeps oxygen available to the roots and rhizomes, which is essential for active growth. Think of it this way: soggy soil is suffocating, while airy soil is energizing.
Mixing tips:
Mix your components thoroughly in a bucket before potting. You want an even distribution. The final mix should feel light in your hands and, when moistened, should drain water quickly rather than holding it like a sponge.
Quality matters:
Invest in decent components. Cheap potting soil often contains too much peat or wood, which stays wet too long. Good cactus mix should contain ingredients like pumice, sand, and bark already.
Step 4: Provide Bright, Indirect Light, More Than You Think
This is where many snake plant owners go wrong. Yes, these plants can survive in low light, but if you want pups, you need to shift your thinking from survival to thriving.
The light sweet spot:
Your snake plant needs 4-6 hours of bright, indirect light daily. Indirect is key, direct sun can scorch the leaves, creating brown, crispy patches. But it should be bright enough that you could comfortably read a book in that spot without turning on a lamp during the day.
Best placement options:
- South-facing windows (in the Northern Hemisphere): Place the plant 3-5 feet back from the window, or use sheer curtains to filter the light
- West-facing windows: These get bright afternoon light; position the plant 2-3 feet from the window
- East-facing windows: Gentler morning light; you can place the plant closer, even right at the window
- North-facing windows: Generally too dim for pup production unless very large or unobstructed
The grow light solution:
If natural light is limited, LED grow lights are game-changers. Position a full-spectrum grow light 12-18 inches above your snake plant and run it for 10-12 hours daily. Many pup-producing success stories come from plant parents who supplemented with artificial light.
Signs you’re getting it right:
- New growth has vibrant color
- Leaves grow upright and strong, not leaning or stretching
- Leaf margins (if variegated) are pronounced and vivid
- The plant overall looks robust and “happy”
Signs of too much light:
- Brown or bleached patches on leaves
- Leaves turning pale or yellowish
- Dry, crispy leaf tips
Adjust accordingly. Every home is different, so observe your plant and fine-tune.
Step 5: Use Strategic Pruning to Trigger Reproduction
This technique is optional but incredibly effective. By removing some leaves from the mother plant, you create a stress response that often triggers pup production.
The science behind it:
When a snake plant loses leaves, it perceives this as potential danger or damage. Its survival instinct kicks in, prompting it to reproduce, to create backup copies of itself, essentially. It’s the same reason many plants flower and seed after being damaged by herbivores in the wild.
How to do it safely:
- Choose 1-3 of the oldest or outermost leaves (not the newest growth in the center)
- Use clean, sharp scissors or pruning shears sterilized with rubbing alcohol
- Cut at the base of the leaf, as close to the soil as possible
- Make a clean cut in one motion, don’t saw back and forth
- Let the cut callus over naturally; don’t apply anything to it
What to do with the cuttings:
Don’t waste them! You can propagate these leaves in water or soil. While leaf cuttings may lose variegation in some varieties, they’ll still grow into new plants. Just be aware that pups from the rhizome are generally faster-growing and maintain all parent characteristics.
How often to prune:
Do this once, then wait several months to see results. Don’t continually hack away at your plant—one strategic pruning session is enough to trigger the response you want.
Step 6: Feed Strategically During Growing Season
Snake plants are light feeders, but they still need nutrients to produce pups. The key is feeding enough to fuel growth without overfeeding, which can cause more harm than good.
The right fertilizer:
Use a balanced, water-soluble fertilizer with equal NPK ratios (like 10-10-10 or 20-20-20). Dilute it to half the strength recommended on the package—snake plants truly don’t need much.
Feeding schedule:
- Spring and summer: Feed every 4-6 weeks
- Fall and winter: Stop feeding entirely or reduce to once every 2-3 months if your plant is in a warm, bright location and actively growing
Application method:
Water your plant normally first, then apply the diluted fertilizer solution a day or two later. Never fertilize dry soil, as this can burn the roots.
Signs of overfertilizing:
- Brown leaf tips or edges
- White crusty buildup on soil surface (salt accumulation)
- Stunted growth or leaf deformities
- Yellowing leaves despite proper watering
If you see these signs, flush the soil thoroughly with plain water several times to wash out excess salts, and reduce or eliminate fertilizing for a few months.
The organic option:
If you prefer organic, worm castings or compost tea work beautifully. Mix a small amount of worm castings into the top inch of soil once in spring, or water with diluted compost tea monthly during the growing season.
Step 7: Perfect the Soak-and-Dry Watering Cycle
Watering technique might be the single most important factor in snake plant health and pup production. Get this wrong, and nothing else matters.
The soak-and-dry method explained:
This mimics the plant’s natural environment, where periods of rain are followed by complete drying. The cycle stimulates the roots and rhizomes to stay active and explore the soil for water, which often leads to pup production.
How to do it:
- The soak: When it’s time to water, water thoroughly until water runs freely from the drainage holes. Make sure the entire root ball gets wet, not just the top layer.
- The drain: Let all excess water drain completely. Never let the pot sit in standing water.
- The dry: This is the crucial part. Let the soil dry out completely before watering again. For most snake plants in typical indoor conditions, this means waiting 2-4 weeks between waterings.
How to know when to water:
- Stick your finger 2-3 inches into the soil—it should feel completely dry
- The pot should feel noticeably lighter when you lift it
- A moisture meter should read in the “dry” zone
- The leaves might feel slightly less firm (but not wrinkled or soft)
Seasonal adjustments:
- Spring/summer: More frequent watering as the plant is actively growing (maybe every 2 weeks)
- Fall/winter: Much less frequent (potentially every 3-4 weeks or longer) as growth slows
Water quality tips:
If your tap water is heavily chlorinated or hard, let it sit out overnight before using, or use filtered water. Fluoride and chlorine can accumulate in the soil over time and cause leaf-tip browning.
The biggest mistakes:
- Watering on a fixed schedule without checking soil moisture
- Watering lightly and frequently instead of deeply and infrequently
- Using pots without drainage
- Not allowing enough dry time between waterings
Step 8: Maintain Optimal Temperature
Temperature plays a subtle but important role in pup production. Snake plants are tropical plants at heart and do their best reproducing in warm conditions.
The ideal range:
70-90°F (21-32°C) is the sweet spot for active growth and pup production. Within this range, the plant’s metabolic processes run efficiently, allowing it to invest energy in reproduction.
What happens in cooler temps:
Below 65°F (18°C), snake plants go into a semi-dormant state. They won’t necessarily die, but growth slows dramatically or stops, and pup production is unlikely. If your home runs cool, especially in winter, don’t expect new pups until spring.
Protecting from temperature extremes:
- Keep plants away from cold drafts (doors, windows, air conditioning vents)
- Avoid placing near heating vents, which can dry out the leaves
- Don’t let leaves touch cold window glass in winter
- Maintain consistent temperatures; dramatic fluctuations stress the plant
The warmth advantage:
If you have a naturally warm room in your house (maybe a south-facing sunroom or a kitchen that stays warm from cooking), this can be an ideal spot for encouraging pup production during cooler months.
Step 9: Divide the Mother Plant to Stimulate Growth
Division is both a propagation technique and a pup-production trigger. When you physically disturb the rhizome system, you’re sending a powerful signal to the plant: time to make babies.
When to divide:
Every 2-3 years, or when the plant has become very crowded in its pot. Spring is ideal, but early summer works too.
The division process:
- Remove the entire plant from its pot and brush away excess soil so you can see the rhizome structure clearly
- Identify natural division points, these are typically where the rhizomes branch or where distinct clumps of leaves emerge
- Using a clean, sharp knife, cut through the rhizomes to separate sections. Each section should have both leaves and roots attached
- Let cut surfaces dry and callus for a few hours (or overnight for large cuts)
- Pot each division in its own container with fresh soil mix
- Water lightly and place in bright, indirect light
What this accomplishes:
The cutting and disturbance stimulates the rhizomes to send out new growth, often in the form of pups, as the plant works to establish itself in its new space. You’ll frequently see pups emerge within 4-8 weeks after division.
Bonus benefit:
You now have multiple plants, each capable of producing its own pups. Your snake plant collection just multiplied exponentially.
Step 10: Practice Patience and Observation
Here’s the truth that every plant parent needs to hear: you can do everything right and still need to wait. Plants operate on their own timeline, not ours.
Realistic expectations:
After implementing these strategies, you typically see pups emerging within 4-12 weeks during the growing season (spring through early fall). Sometimes it takes longer. Some stubborn plants might make you wait an entire growing season.
What to look for:
Pups usually first appear as small, pointed shoots emerging from the soil near the base of the mother plant. They might be pale green or even white at first, darkening as they emerge and start photosynthesizing.
Signs your strategies are working:
- New leaves on the mother plant are vibrant and strong
- The plant overall looks healthy and robust
- You notice the plant has “filled out” its pot
- Roots are visible at drainage holes (indicating active growth)
When pups are ready to separate:
Wait until pups are at least 4-6 inches tall and have developed their own small root system. Pups that are too small often struggle to establish independently.
How to Separate and Pot Snake Plant Pups: A Detailed Guide
Once those precious pups reach a good size, you have two options: leave them attached to create a fuller, bushier mother plant, or separate them to create new independent plants. Here’s how to do the latter successfully.
Timing the Separation
The best time to separate pups is during the active growing season (spring or early summer) when they’ll have the best chance of establishing quickly. Pups should be:
- At least 4-6 inches tall
- Have their own small root system (you’ll see this when you unpot the mother plant)
- Looking healthy and vigorous
Tools You’ll Need
- Clean, sharp knife or pruning shears (sterilized with rubbing alcohol)
- Fresh potting mix (the same formula as before)
- Small pots with drainage holes (4-6 inches for most pups)
- Newspaper or a tarp to work on
- Optional: rooting hormone powder
The Separation Process Step-by-Step
Step 1: Prepare your workspace
Lay out newspaper or a tarp. Have all your supplies ready. This can get messy, but organization makes it easier.
Step 2: Remove the mother plant
Gently tip and slide the entire plant out of its pot. If it’s stubborn, run a knife around the inside edge or tap the pot’s bottom. Be patient, you don’t want to damage the rhizomes.
Step 3: Examine the root structure
Brush away enough soil to see how the pups are connected to the mother plant. You’re looking for the rhizome that connects the pup to the parent.
Step 4: Make clean cuts
Using your sterilized knife, cut through the rhizome to separate the pup. Try to give the pup some roots of its own, at minimum, a small section of rhizome with some root growth is ideal.
Make decisive cuts. Sawing back and forth can cause unnecessary damage.
Step 5: Let cuts callus
This step is optional but recommended, especially for large cuts. Let both the pup and the mother plant’s cut surfaces dry in open air for a few hours or overnight. This allows a protective callus to form, reducing the risk of rot.
If you’re impatient (I get it), you can skip this for small cuts and proceed directly to potting.
Step 6: Pot the pup
Choose a small pot, don’t go too big or the pup will struggle to dry out between waterings. Fill with your well-draining soil mix and plant the pup at the same depth it was growing before.
Firm the soil gently around the pup so it stands upright but isn’t compacted.
Step 7: Initial care
Water very lightly, just enough to settle the soil. Place the pup in bright, indirect light but not full sun for the first week or two while it adjusts.
Step 8: Ongoing care
Treat your new pup like a mature snake plant in miniature: bright light, soak-and-dry watering, minimal fertilizer. Be patient, it might not grow quickly at first as it focuses on establishing roots.
Troubleshooting Pup Separation
Pup has no roots: If you’ve cut a pup that has minimal or no roots, don’t panic. Treat it like a cutting. Let it callus thoroughly, then place it in very light, barely moist soil. Keep it in warmth and bright light. Roots usually develop within a few weeks.
Pup is wilting after separation: This is normal for the first few days as it adjusts to independence. Make sure it’s in appropriate light (not too bright) and the soil is barely moist, not wet. The pup should perk up within a week.
Mother plant looks sparse after removing pups: This is temporary. With proper care, the mother will likely produce more pups to fill in the space. You can also repot her into a slightly smaller container if she looks too lonely.
Advanced Tips for Maximum Pup Production
Once you’ve mastered the basics, here are some advanced strategies to really maximize your snake plant’s reproductive potential.
The Controlled Stress Technique
Remember how we talked about strategic stress? Here’s how to fine-tune it:
After your plant is well-established in its new pot and receiving good light, deliberately let it dry out slightly more than normal (but not to the point of wilting). Then water thoroughly. This dry-wet cycle shock can trigger pup production.
Similarly, a sudden temperature increase (like moving the plant to a warmer room) can stimulate reproductive behavior.
The Bottom Heat Method
Some advanced growers place their snake plants on seedling heat mats, which warm the soil from below. This encourages rhizome activity and can speed up pup production. Keep temperatures around 75-80°F at the root zone.
Rotating for Even Growth
Rotate your plant a quarter turn every time you water. This ensures all sides receive equal light exposure, which promotes balanced growth and can encourage pups to emerge from all around the mother plant, not just the side facing the window.
The Companion Planting Trick
Some growers report increased pup production when snake plants are grouped with other plants. The increased humidity and subtle plant-to-plant communication (yes, it’s a real thing, plants release chemical signals) might play a role.
Mycorrhizal Fungi
Consider adding mycorrhizal fungi to your soil mix. These beneficial fungi colonize plant roots and improve nutrient and water uptake, giving your snake plant extra resources to invest in pup production. You can find mycorrhizal inoculant at garden centers.
Troubleshooting: When Pups Won’t Come
You’ve done everything right, but still no pups? Let’s troubleshoot.
Issue: It’s Been Months With No Pups
Possible causes:
- The plant is still too young or the rhizomes aren’t mature enough
- Light levels are insufficient (the most common issue)
- The plant is actually too stressed (overwatered, underwatered, or unhealthy)
- Temperature is too cool
- It’s winter or the dormant season
Solutions:
- Verify the plant is at least 1-2 years old
- Increase light exposure or add a grow light
- Check for root rot, pests, or other health issues and address them
- Wait for the growing season and ensure warmth
- Consider dividing the plant to trigger pup production
Issue: Pups Appear But Stay Tiny
Possible causes:
- Insufficient light for continued growth
- Nutrient deficiency
- Pot is too small or too large
- Inconsistent watering
Solutions:
- Boost light levels significantly
- Begin a regular feeding schedule
- Evaluate pot size and repot if needed
- Establish a consistent soak-and-dry routine
Issue: Pups Rot or Die
Possible causes:
- Overwatering (most common)
- Poor drainage
- Fungal or bacterial infection
- Damage to rhizome during repotting
Solutions:
- Immediately reduce watering frequency
- Check drainage holes and soil composition
- Remove affected pups and treat with fungicide if needed
- Be gentler during future repotting sessions
Issue: Mother Plant Declining While Producing Pups
Possible causes:
- The plant is investing all energy in pups at the expense of itself
- Nutrient deficiency
- Pest infestation draining resources
Solutions:
- Increase fertilization
- Remove some pups to redirect energy to the mother
- Inspect for pests (check under leaves and in soil) and treat accordingly
Caring for Your Growing Snake Plant Family
As your single snake plant becomes many, you’ll need to think about ongoing care for your expanding collection.
Space Management
Snake plants can take over if you let them! Consider:
- Which pups to keep and which to separate
- Whether to gift or sell excess pups
- Creating a dedicated plant shelf or area with adequate lighting for your collection
Consistency is Key
All your snake plants will thrive best with consistent care:
- Water all of them using the soak-and-dry method
- Rotate them all regularly for even light
- Feed during the same schedule
- Monitor all of them for pests or problems
Record Keeping
It sounds nerdy, but keeping simple notes can be incredibly helpful:
- When you repotted each plant
- When pups appeared and when you separated them
- Which plants are the most prolific pup-producers
- Any problems and how you solved them
This information helps you refine your technique over time and identify your star performers.
Enjoying the Process
Remember, the goal isn’t just to produce as many plants as possible—it’s to enjoy the process of growing and nurturing these beautiful, resilient plants. Each pup that emerges is a little victory, a tangible result of your care and attention.
Final Thoughts: Your Journey to Snake Plant Abundance
Learning to propagate snake plants through pup production is genuinely one of the most rewarding aspects of houseplant care. There’s something deeply satisfying about taking a single plant and, through knowledge and patience, transforming it into a thriving family.
The techniques I’ve shared here are based on years of experience and experimentation, but remember: every plant is an individual. Your snake plant might respond slightly differently than mine. The key is observation, patience, and a willingness to adjust your approach based on what your specific plant needs.
Here’s what I want you to remember most:
Light is your biggest lever. If you take away just one tip from this entire guide, let it be this: increase light exposure. More than any other single factor, adequate bright, indirect light will drive pup production.
Patience is not optional. Plants don’t read our schedules or care about our timelines. They’ll produce pups when they’re ready, not when we demand it.
Healthy plants produce pups. Before worrying about reproduction, make sure your snake plant is genuinely healthy. Address any root rot, pest issues, or nutrient problems first.
Start with one and scale up. Don’t try to force ten plants to produce pups simultaneously. Master the process with one plant, learn what works in your specific environment, then expand your efforts.
And here’s perhaps the most important thing: enjoy the journey. Yes, the goal is to never buy another snake plant, but along the way, you’re developing plant care skills, learning to read your plants’ needs, and creating a greener, more beautiful living space.
Every time a new pup pushes through the soil, take a moment to appreciate it. That little green shoot is evidence that you’ve created the right conditions for life to flourish. That’s pretty amazing when you think about it.
So go forth and propagate! Your snake plant adventure is just beginning, and I have a feeling you’re going to love where it takes you. Before long, you’ll be the friend who always has a snake plant to share, the person with impossibly lush snake plant displays, the go-to expert when others want propagation advice.
And you’ll never need to buy another snake plant again.
Happy growing! 🌱