

If you love decorating for Halloween but don’t want to deal with the mess of carving pumpkins, you’re in the right place.
These No-Carve Pumpkin Ideas for Halloween prove that you can create festive, creative displays with nothing more than a little paint, fabric, flowers, paper, or a few fun craft supplies.
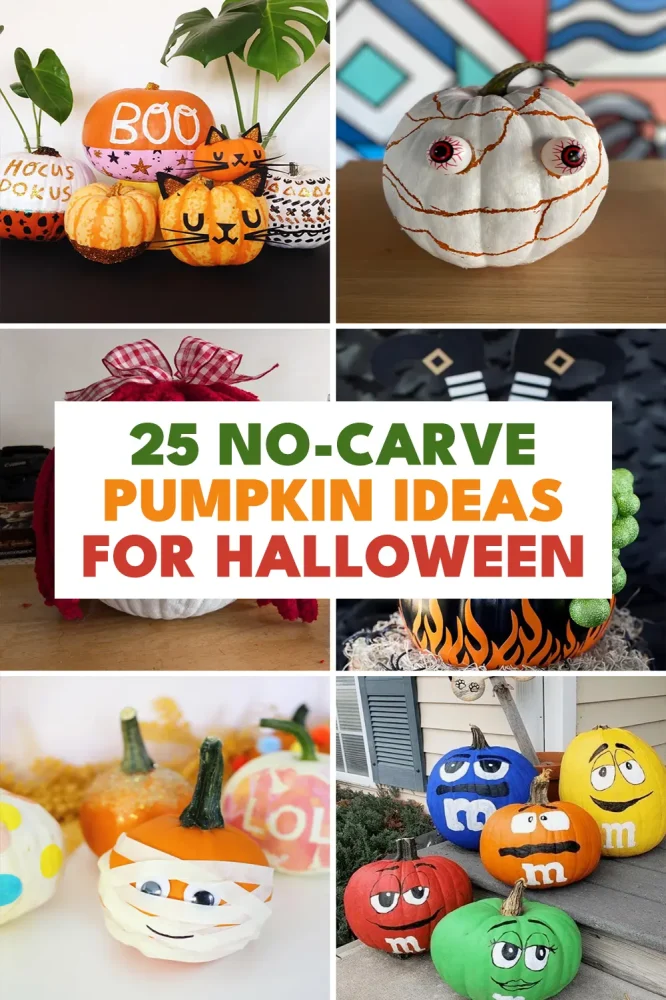
They last longer than carved pumpkins, are much easier to make with kids, and give you endless ways to match your own decorating style.
From cute and colorful designs to elegant pumpkins you can display on your porch or dining table, there’s something here for every home. Some ideas take just a few minutes, while others are perfect for a relaxing weekend craft session.
Grab a pumpkin, pick your favorite supplies, and have fun trying these No-Carve Pumpkin Ideas that are sure to impress family, friends, and trick-or-treaters alike.
More Halloween Home Decor Ideas:
- 25 Black and White Halloween Decor Ideas
- 25 Farmhouse Halloween Decor Ideas
- 19 Black and Gold Halloween Decor Ideas
- 27 Indoor Skeleton Halloween Decor Ideas
- 25 Halloween Outdoor Skeleton Decor Ideas
Confetti Splatter Mini Pumpkin
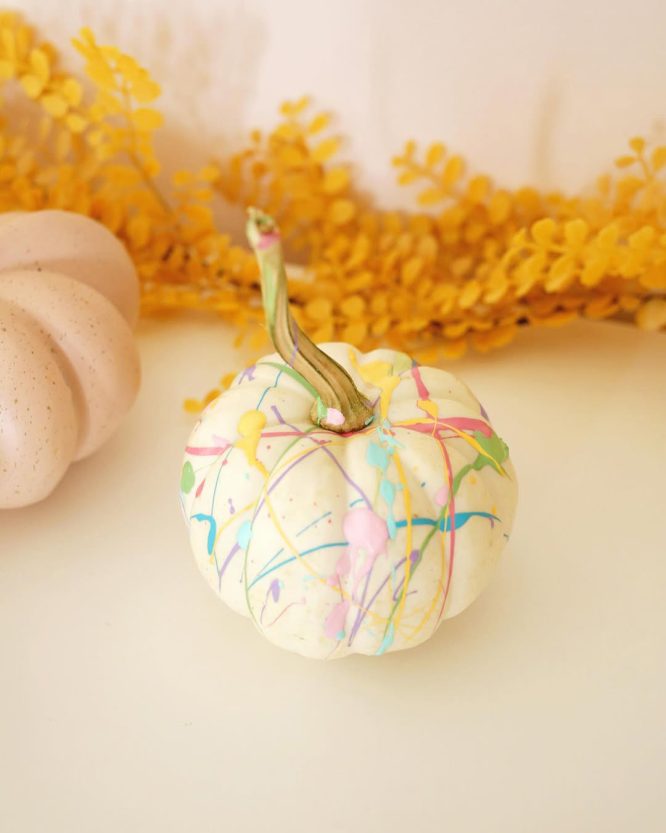
Grab some acrylic paint in a bunch of colors and just flick it at a white mini pumpkin with a paintbrush.
That’s basically the whole technique. It looks fancy but it’s honestly one of the easiest crafts on this list.
Lay down some newspaper first, because paint goes everywhere. Once it dries, group a few splatter pumpkins together with plain ones for contrast.
The mix of pastel drips against the cream pumpkin gives it a playful, almost Jackson Pollock feel. (📸 Courtesy childhood__magic)
Sharpie Sayings And Kitty Faces
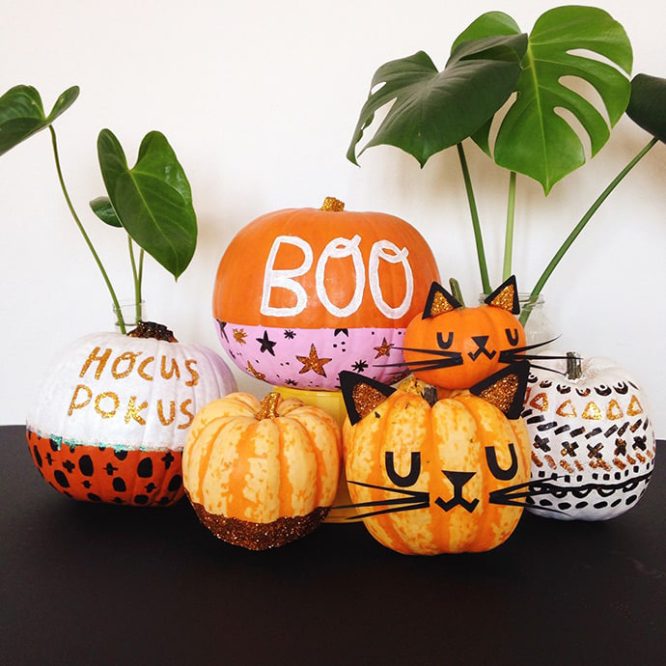
A paint pen and a steady hand are all you need for this one.
Write words like “Hocus Pokus” or “Boo” straight onto the pumpkin in bold letters. Add some gold stars or dots around the text to fill in empty space.
For the cat pumpkins, just paint on triangle ears and a simple face with whiskers. Mix white, orange, and small pumpkins of different sizes for a fun cluster.
Set them near houseplants for a cozy porch or entryway display. (📸 Courtesy Handmadecharlotte)
Candy Character Face Pumpkins
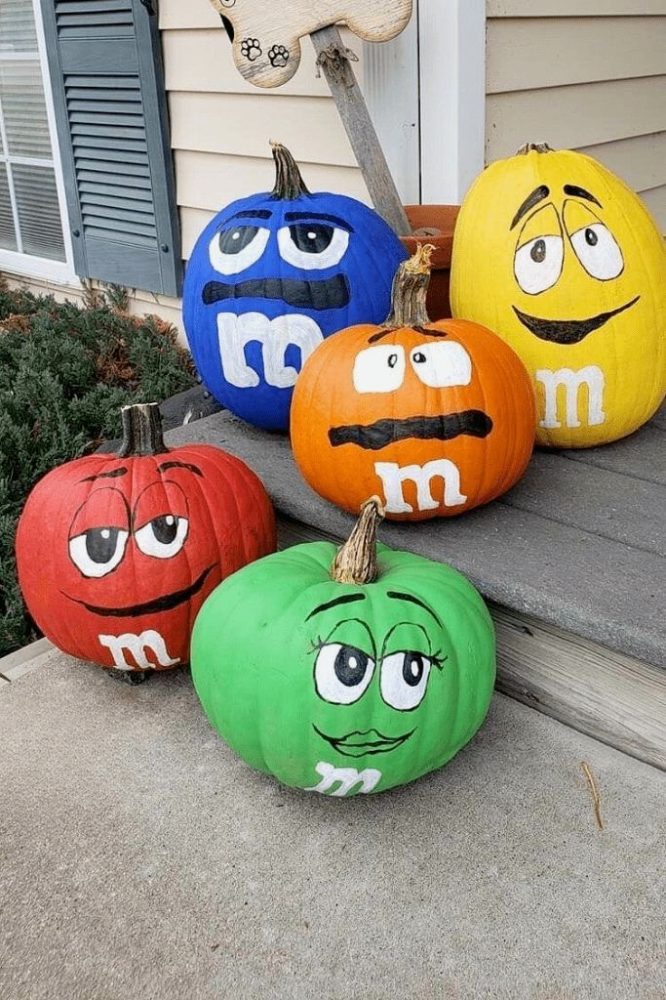
Turn a batch of pumpkins into a rainbow of candy characters with craft paint.
Pick a bright base color for each one: red, blue, yellow, orange, green. Paint on big cartoon eyes and a mouth to match the personality you’re going for.
A small white “m” near the bottom seals the look. This idea works great for a group display since the different colors play off each other so well.
Set them on your steps for an instant crowd-pleaser that both kids and adults recognize right away. (📸 Courtesy Unknown)
Cheesecloth Wrapped Mummy Pumpkin
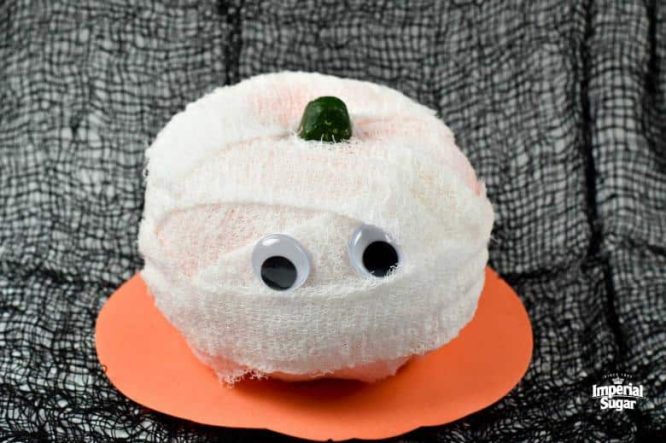
Cheesecloth is the secret weapon here.
Wrap strips around a pumpkin, leaving the stem poking out at the top like a little sprout. Don’t wrap it too neatly, mummies are supposed to look a little messy.
Add two googly eyes peeking through the gaps. That’s really all it takes.
This one’s great for last-minute decorating since cheesecloth is cheap and easy to find. Set it on an orange background for extra contrast. (📸 Courtesy Imperialsugar)
Blue Willow Decoupage Pumpkin
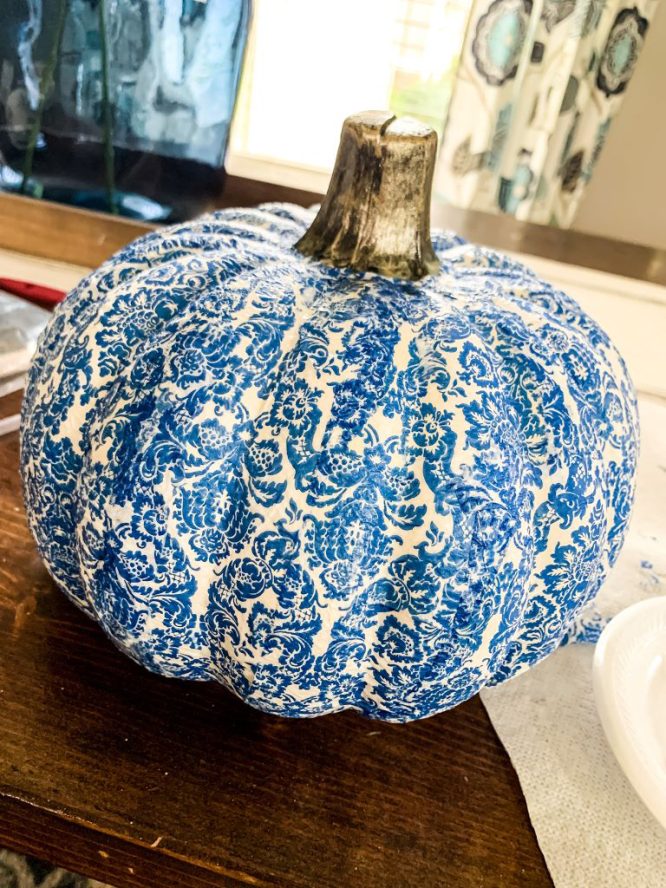
Decoupage napkins are a total game changer for pumpkin decorating.
Pick a napkin with a pattern you love, blue and white damask works beautifully here, and separate the printed layer from the plain ones underneath. Brush on some Mod Podge, lay the napkin over the pumpkin, and smooth out the wrinkles as you go.
Keep adding pieces until the whole pumpkin is covered. Let it dry completely before moving it.
The end result looks like fine china, not a craft pumpkin. (📸 Courtesy Cottageinthemitten)
Pressed Flower Covered Pumpkins
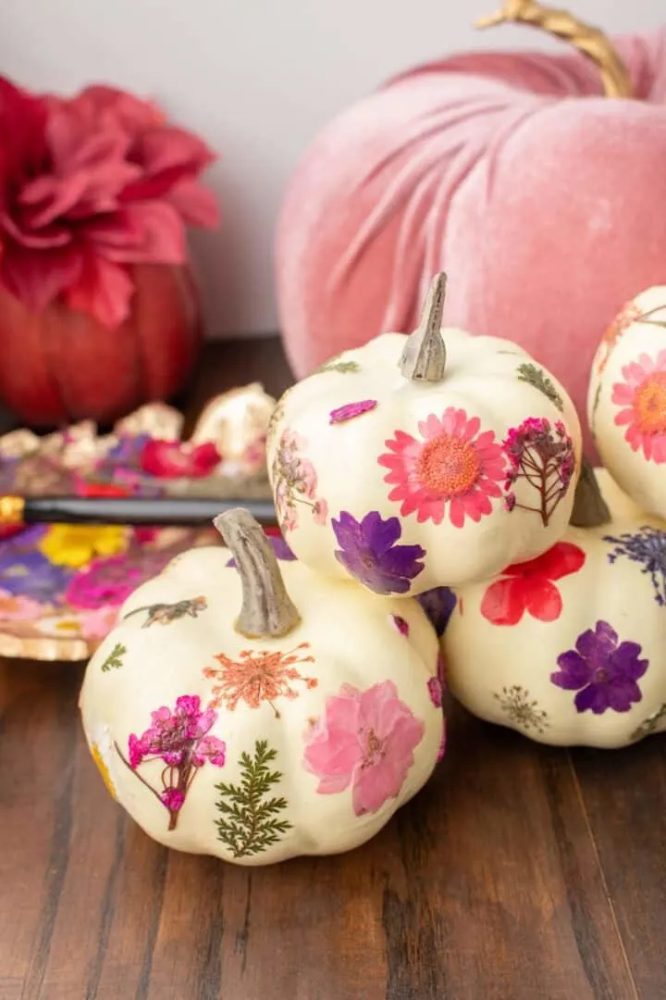
If you’ve got pressed flowers sitting around from summer, this is their moment to shine.
Brush a thin layer of Mod Podge onto a white pumpkin. Press your flowers on one at a time, then seal everything with another coat over the top.
Mix different flower sizes and colors for the best effect. Small pumpkins work especially well since you don’t need a huge flower collection to cover them.
This one feels more fall garden party than spooky Halloween, which I love. (📸 Courtesy Hellowonderful)
Dried Seed Pod Owl Pumpkin
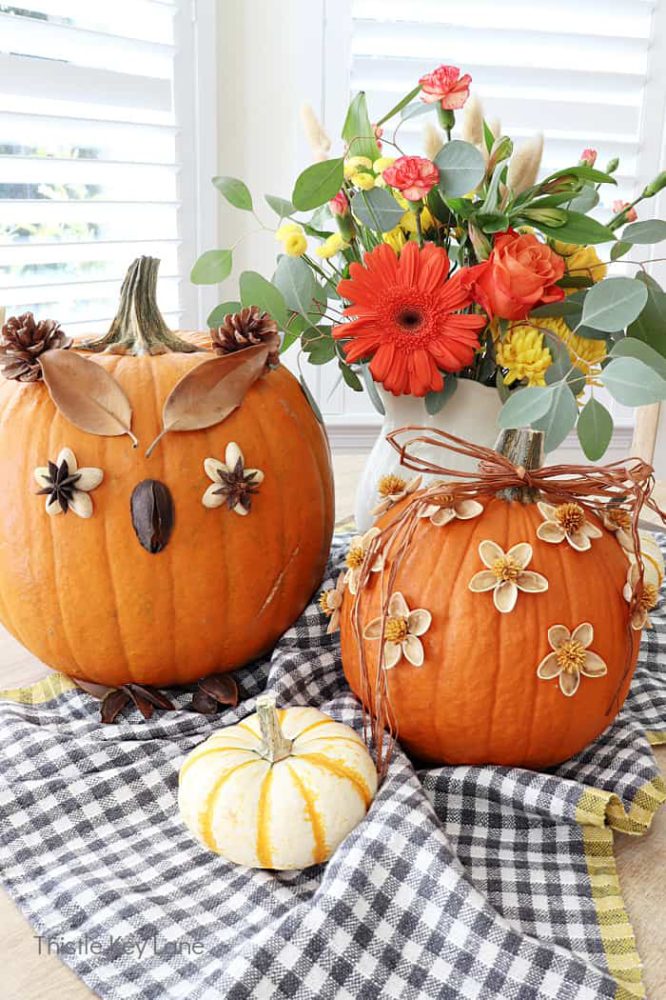
Nature walks basically become a supply run with this idea.
Dried seed pods, star anise, and little leaves turn a plain pumpkin into an owl face. Two matching seed pods make the eyes, a dark seed or bean works for the beak, and pinecones or leaves become the ears.
On a second pumpkin, glue smaller flower-shaped pods all over for texture. Raffia tied around the stem adds a nice rustic touch.
Set them both on a plaid cloth for a cozy autumn tablescape. (📸 Courtesy Thistlekeylane)
Chalk Paint Trick Or Treat Pumpkin
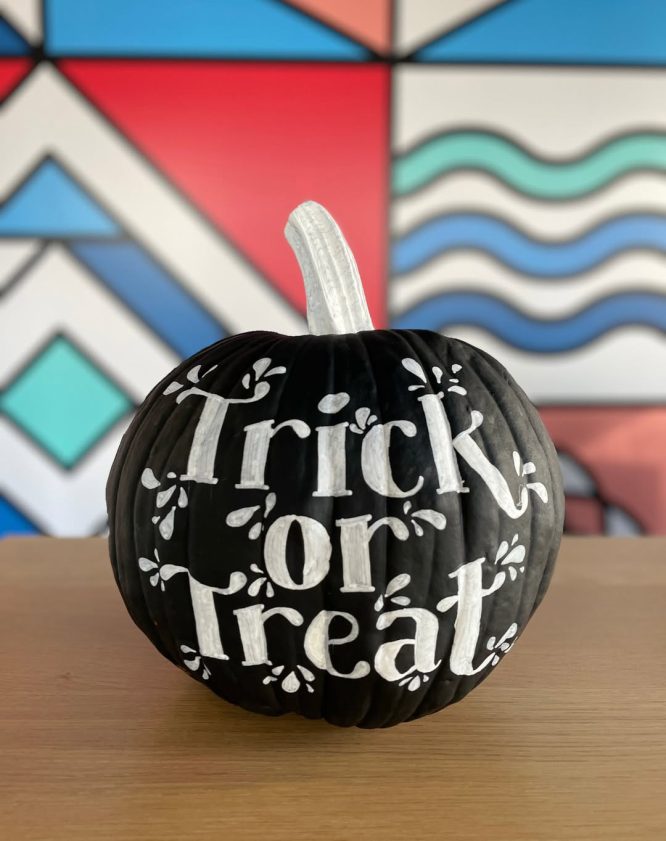
Black paint and a white paint pen make for such a striking combo.
Cover the whole pumpkin in matte black first and let it dry. Then write out your phrase in big bubble letters using white paint or a paint pen.
Little teardrop shapes scattered around the words fill in the gaps nicely. This one reads like a chalkboard sign, which makes it perfect for a kitchen counter or party table.
Simple, bold, and it photographs really well too. (📸 Courtesy Cravecupcakes)
Fall Leaf Decoupage Pumpkin
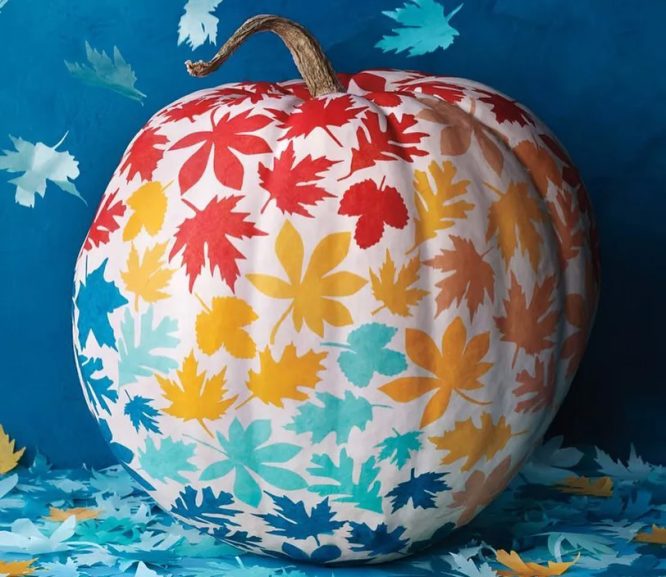
This is decoupage taken to the next level.
Cut out paper leaves in every fall color you can find: red, orange, yellow, teal. Layer them all over a white pumpkin using Mod Podge, overlapping the edges so no white shows through.
Work in small sections so the glue doesn’t dry before you place the leaves. It takes patience, but the payoff is huge.
The finished pumpkin looks like it’s made entirely of confetti leaves, which is such a showstopper centerpiece. (📸 Courtesy Betterhomesandgardens)
Felt Owl Face Pumpkin
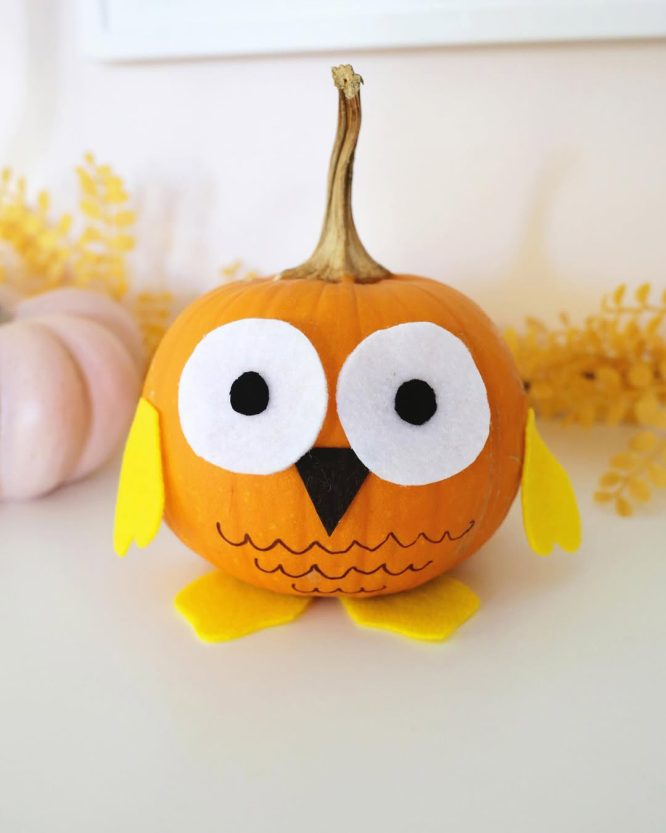
Felt scraps and hot glue are all this idea really needs.
Cut two big white circles for eyes, smaller black circles for the pupils, and a little black triangle beak. Glue them onto an orange pumpkin, keeping the stem as the owl’s little tuft of hair.
Add yellow felt wings on the sides and feet at the base. It’s such a simple project that kids can help with most of it.
The end result is more cute than spooky, perfect for a family-friendly display. (📸 Courtesy childhood__magic)
Painted Frankenstein And Scarecrow Duo
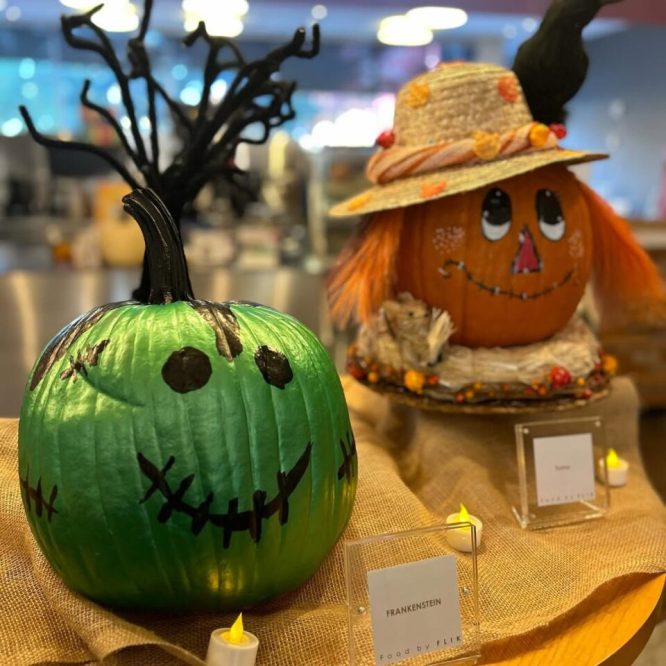
Two very different characters, same easy painting technique.
For Frankenstein, paint the pumpkin bright green and add black stitches, bolts, and a scowling face with acrylic paint. A twisty black branch stuck in the top makes creepy hair.
For the scarecrow, keep the pumpkin its natural orange and paint on rosy cheeks and a friendly smile. Top it with a small straw hat and yarn for hair.
Displaying them side by side gives you both spooky and sweet in one shot. (📸 Courtesy Flikhospitality)
Stacked Teddy Bear Pumpkin
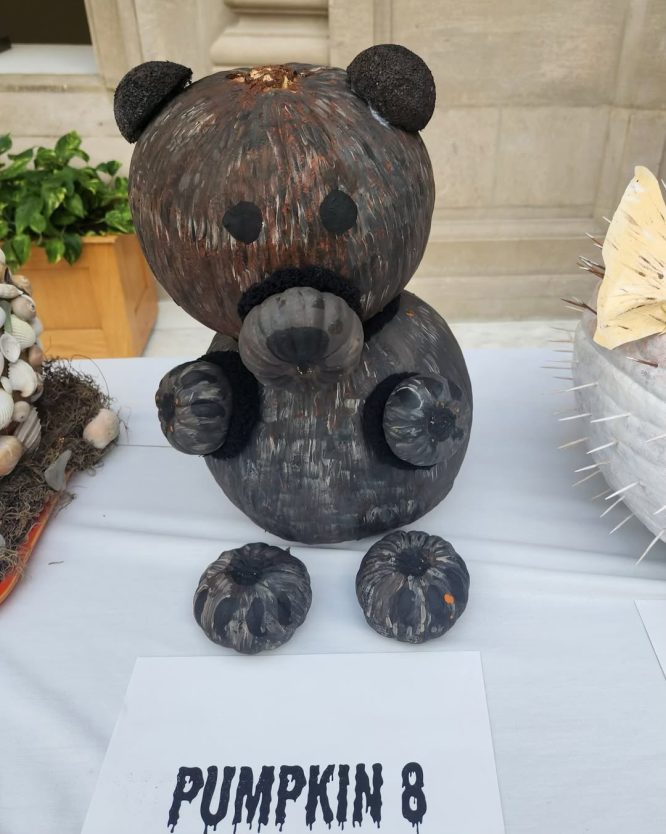
Stacking two pumpkins is the trick that makes this one work.
Use a bigger pumpkin for the head and a smaller one for the body, gluing or stacking them securely. Paint the whole thing in a mottled brown or charcoal wash for texture.
Small pumpkins become the ears, paws, and feet, and a bit of black felt fills in the muzzle. Two dots of black paint finish the face.
It’s a fun one for anyone who wants a Halloween pumpkin that isn’t scary at all. (📸 Courtesy Newporthospital)
Baseball Cap And Shades Pumpkin
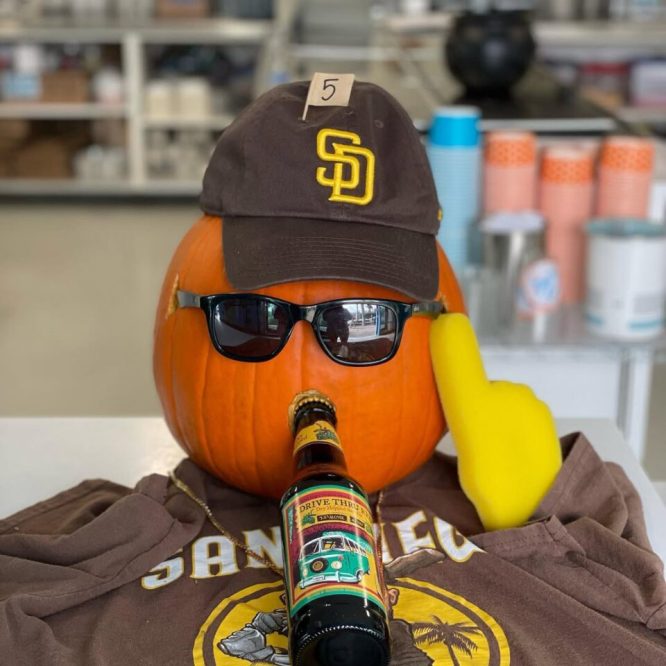
Sometimes a pumpkin just needs an outfit, not paint.
Grab a baseball cap, a pair of sunglasses, and even a little shirt to dress up a plain orange pumpkin like a person. A rolled-up yellow glove works as a goofy hand holding a drink.
This one’s less about craft skills and more about having fun with props you already own. Great for tailgates, game day parties, or just making people laugh on your front table.
No paint, no mess, all personality. (📸 Courtesy Calicreamencinitas)
Green Wig Candy Face Pumpkin
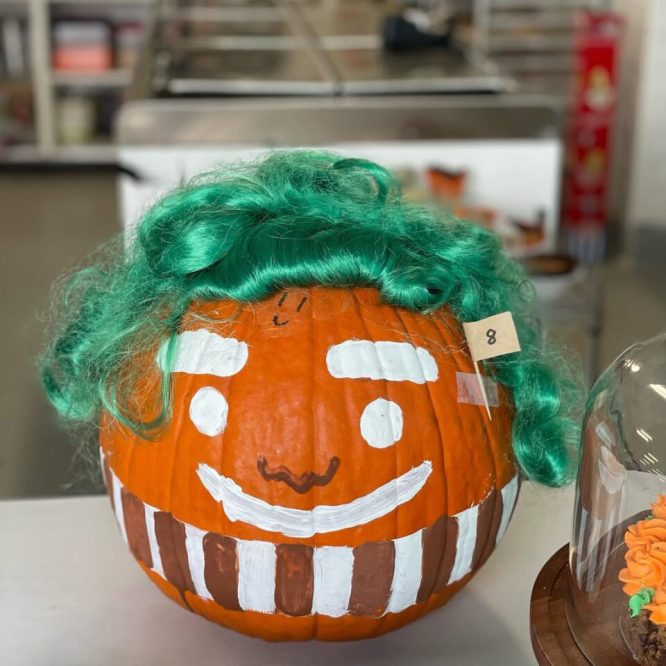
A costume wig turns a painted pumpkin into a full character in seconds.
Paint the pumpkin orange with white and brown stripes across the bottom to look like a candy bar wrapper. Add simple white circle cheeks and a smiling mouth.
Then just plop a bright green wig on top like hair. It’s a silly, over-the-top idea that works so well for a candy shop or party theme.
Kids especially get a kick out of this one. (📸 Courtesy Calicreamencinitas)
Washi Tape Mummy Pumpkin
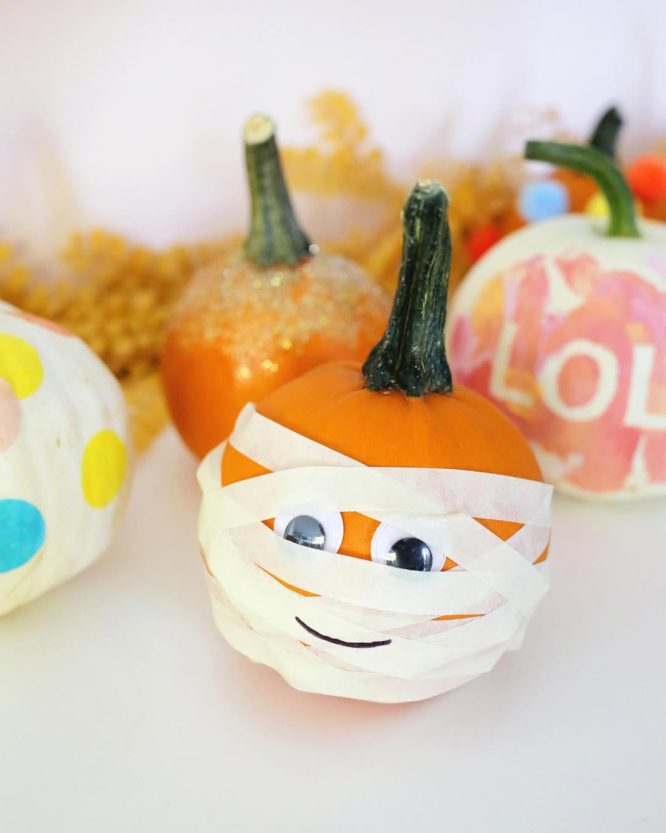
Thin strips of paper tape wrapped criss-cross style give this mummy its bandaged look.
Start near the bottom and wrap upward, leaving small gaps for the eyes. Two mismatched googly eyes peeking through the wraps add all the personality.
A curved black line for the mouth finishes it off. This version feels softer and cuter than the cheesecloth mummy, more pastel Halloween than spooky.
Group it with other painted mini pumpkins for a sweet tablescape. (📸 Courtesy childhood__magic)
Paper Wing Bat Pumpkin
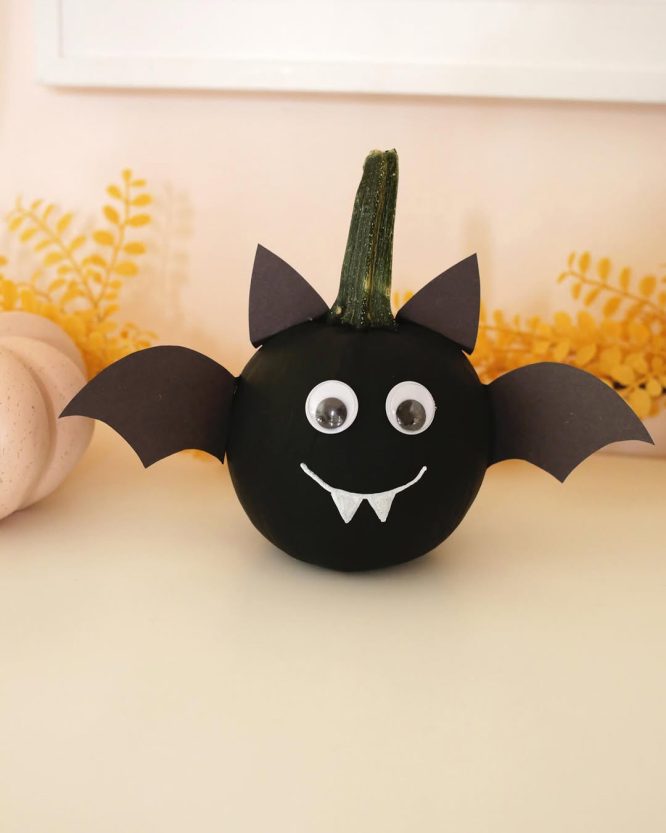
Black paint and a couple pieces of construction paper are all this bat needs.
Paint a small pumpkin solid black, keeping the natural green stem as is. Cut bat wings and little ear shapes out of black cardstock, then glue them right onto the pumpkin.
Googly eyes and a painted fang smile bring the face to life. This one’s compact and easy, great for lining up a whole row of them on a mantel.
Simple shapes, big impact. (📸 Courtesy childhood__magic)
Cracked Porcelain Eyeball Pumpkin
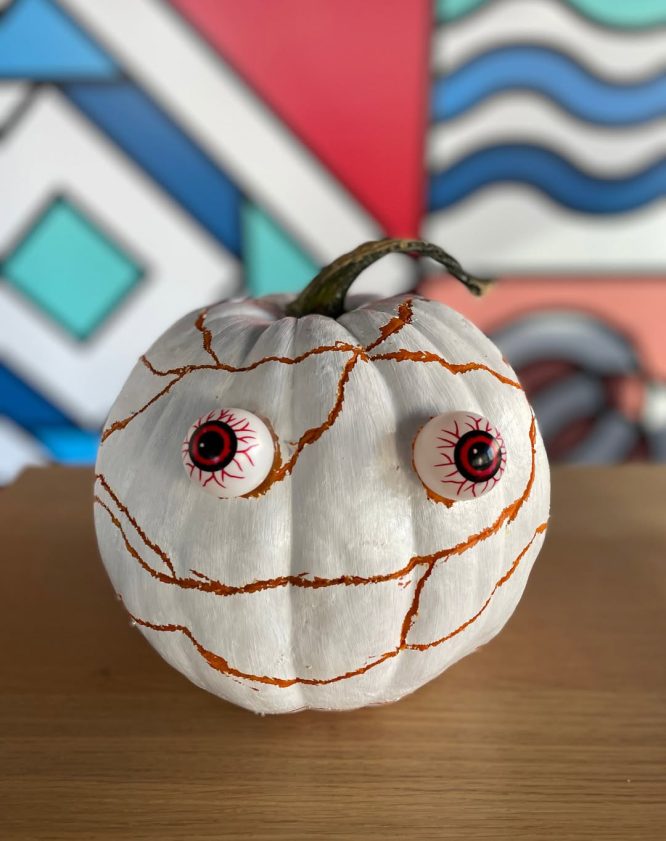
White paint and a little orange underneath create this cracked, creepy-doll effect.
Paint the whole pumpkin white first. Once it’s dry, add jagged orange lines cracking across the surface like broken porcelain.
Press in a couple of fake eyeballs, the bloodshot kind you can find at any Halloween store. They peek right out from the cracks, which is honestly a little unsettling in the best way.
This idea leans more toward genuinely spooky than the cute ones on this list. (📸 Courtesy Cravecupcakes)
Skeleton Face Pumpkin Family
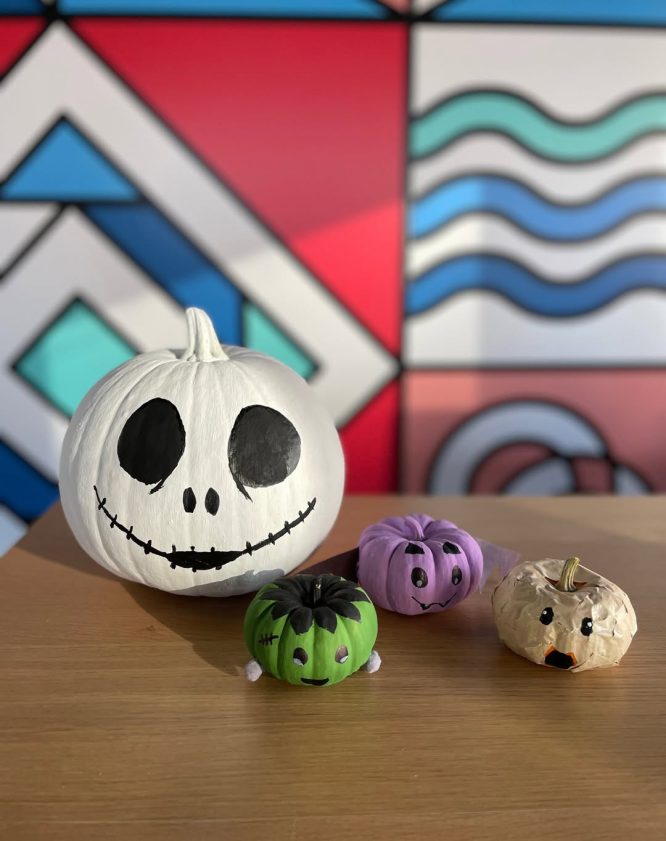
One big spooky grin, plus a whole family of mini monster faces.
Paint a large pumpkin white, then add big black eye sockets and a stitched-up smile for that classic skeleton look. It’s simple but instantly recognizable.
For the smaller pumpkins, paint each one a different color, green, purple, tan, and give them their own quirky monster faces. Little white feet on the green one add extra charm.
Line them all up together for a mini monster mash display. (📸 Courtesy Cravecupcakes)
Stacked Snowman Character Pumpkin
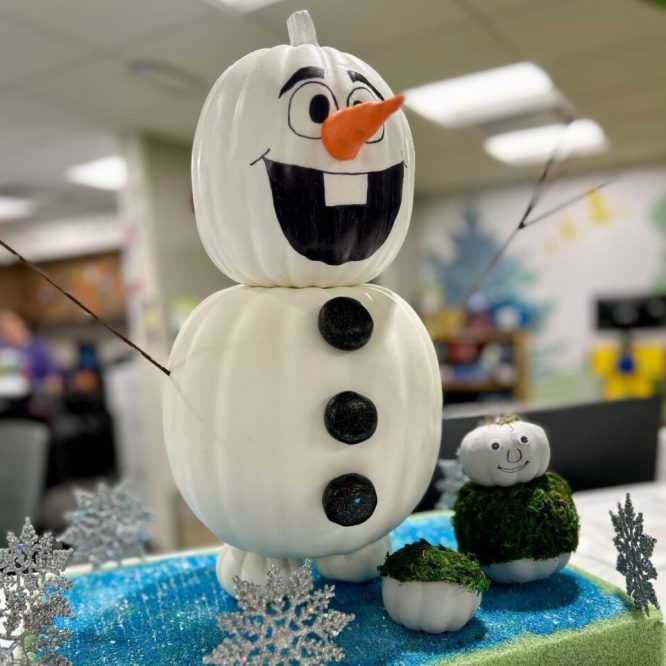
Not every Halloween pumpkin has to stay in the Halloween lane.
Stack two white pumpkins to build a snowman shape, then paint on big cartoon eyes, eyebrows, and a goofy open smile. A carrot-shaped piece of clay or felt makes the nose.
Black pom-poms or painted circles become the buttons down the front. Add tiny moss-covered pumpkins nearby as little snowman friends.
This idea works so well if you want decor that carries you straight through to winter. (📸 Courtesy Shrinersohio)
Gold Splatter Painted Pumpkin Stack
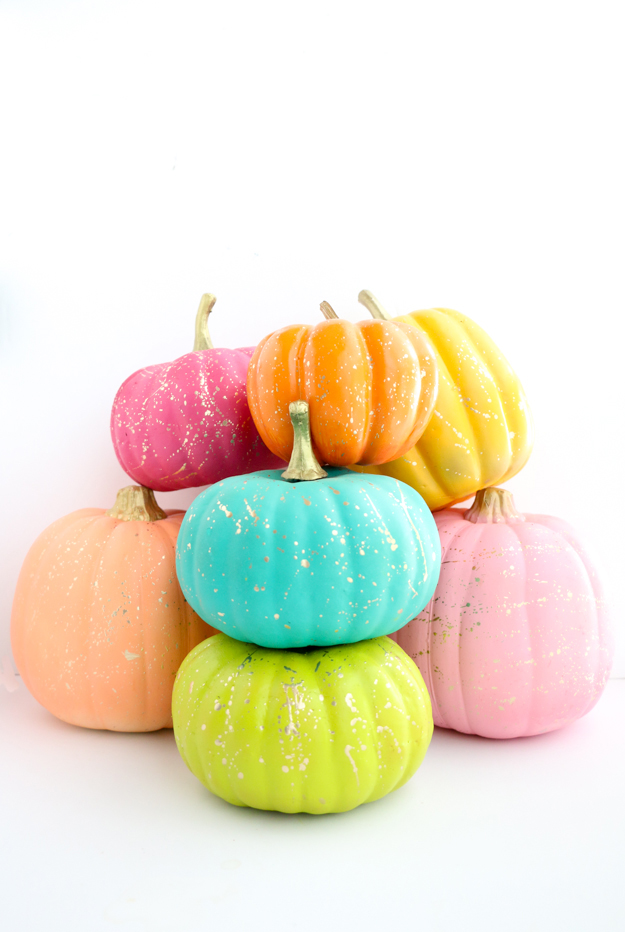
Metallic gold paint takes the confetti splatter idea and gives it a glam upgrade.
Start with pumpkins in bold solid colors, hot pink, turquoise, lime, coral. Once that base coat dries, flick gold paint across each one for a speckled, celebratory finish.
Stack them together in a pyramid for maximum impact. The mix of saturated color and metallic shine feels more birthday party than typical Halloween, which makes it stand out.
Great for anyone who wants pumpkins that don’t take themselves too seriously. (📸 Courtesy Akailochiclife)
Handprint Ghost And Jack-O-Lantern Pumpkins
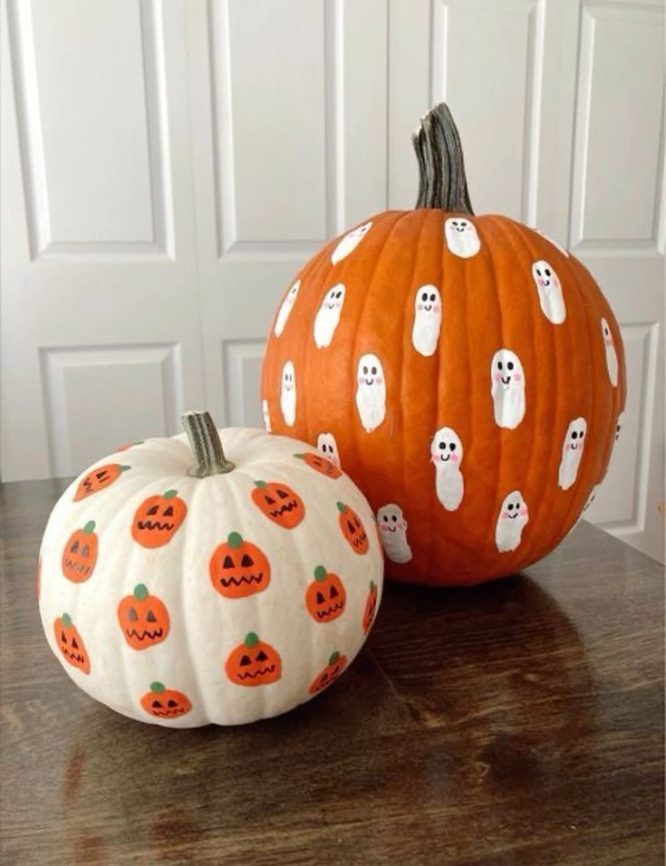
Handprints make the sweetest ghosts you’ll ever see.
Dip your hand in white paint and press it onto an orange pumpkin, then add a little smiling face once it dries. Repeat all over the pumpkin for a whole ghost gang.
On the white pumpkin, paint small jack-o-lantern faces in orange with a tiny green stem on top. Space them out evenly so it reads like a fun pattern.
This is such a sweet one to make with kids, since their handprints are part of the design. (📸 Courtesy Pinterest pin)
Bubbly Witch’s Cauldron Pumpkin
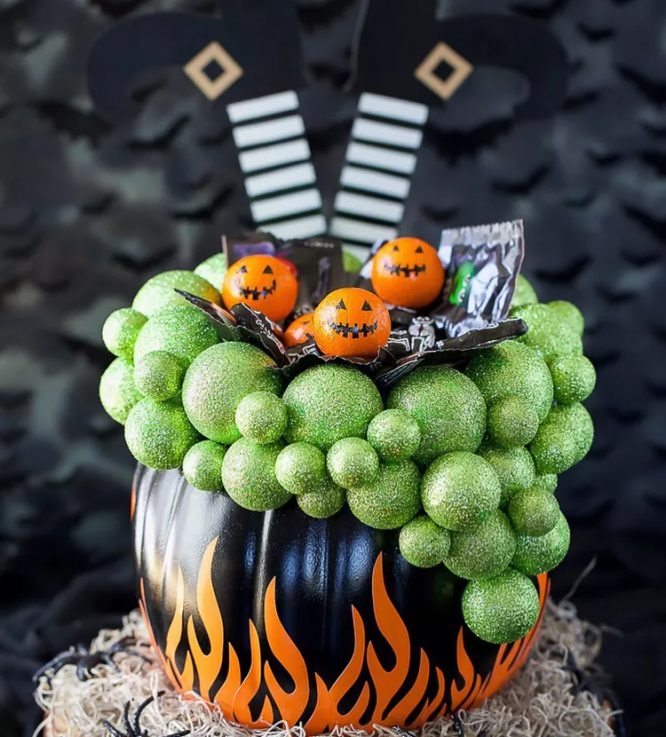
This one takes a little more effort, but wow does it pay off.
Paint a pumpkin black with orange flames climbing up the sides, like a bubbling cauldron. Glue on foam balls in different sizes, all covered in glitter, to build up a bubbly green potion on top.
Tuck in a few small orange pumpkins with jack-o-lantern faces peeking out of the froth. Witch boot cutouts stuck in the back finish the whole scene.
Set it as your Halloween party centerpiece and just watch people stop and stare. (📸 Courtesy apumpkinandaprincess)
Woodland Deer And Fox Pumpkins
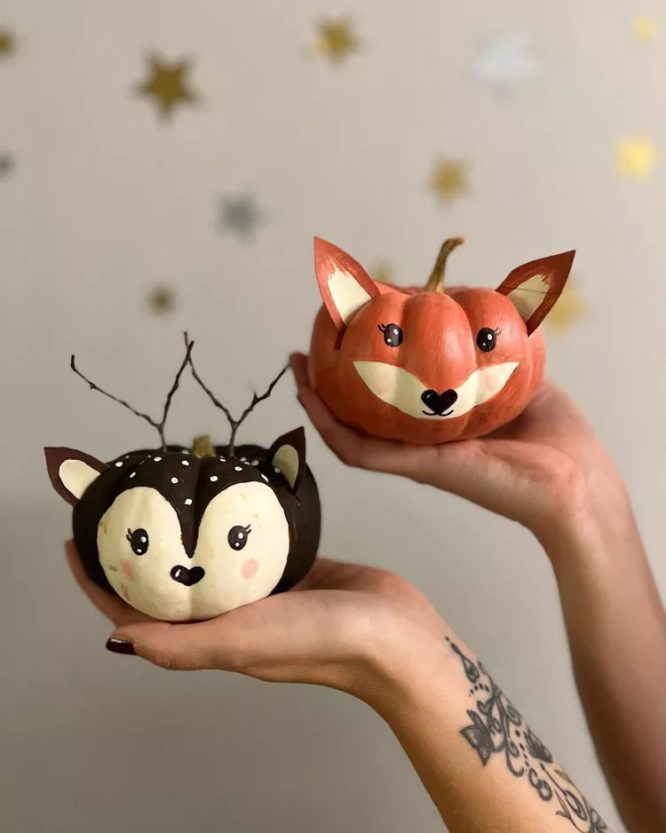
Small pumpkins turn into the cutest woodland creatures with just paint and a few twigs.
For the deer, paint the top half dark brown with white dots and leave the face cream colored. Poke a couple of curvy twigs into the top for antlers, then add rosy cheeks and a heart-shaped nose.
For the fox, paint the whole pumpkin a warm orange-red and add cream patches around the eyes and muzzle. Little pointed ears painted at the top complete the look.
These are small enough to sit on a shelf or mantel without taking over the space. (📸 Courtesy englishandartforkids)
Paper Bat Silhouette Pumpkin Duo
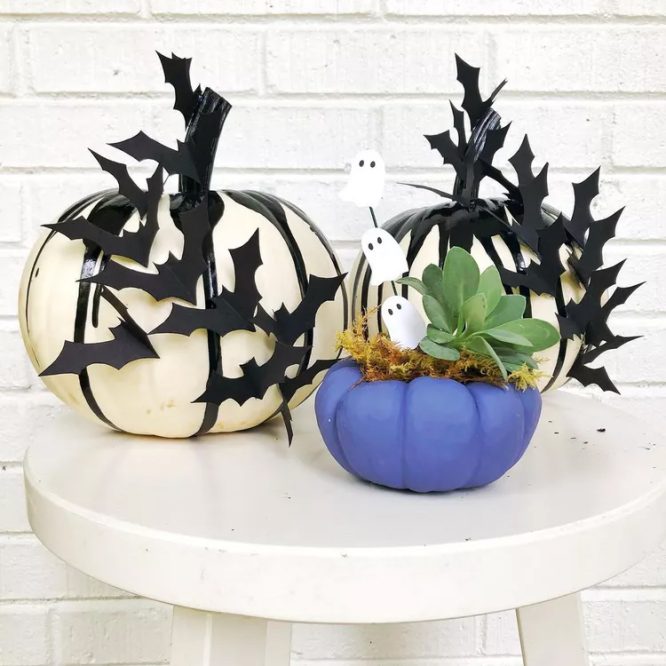
Black cardstock bats scattered across a pumpkin give you drama without any painting skill required.
Cut out a bunch of bat shapes in different sizes from black paper. Glue them all over a white or cream pumpkin, clustering some together and spacing others further apart for movement.
Pair it with a small painted pumpkin turned into a mini succulent planter, topped with real greenery and paper ghost picks. The contrast between spooky bats and a fresh little garden is such a nice touch.
Great for a porch display that mixes creepy and pretty. (📸 Courtesy upcountrydesign)
Yarn Haired Rag Doll Pumpkin
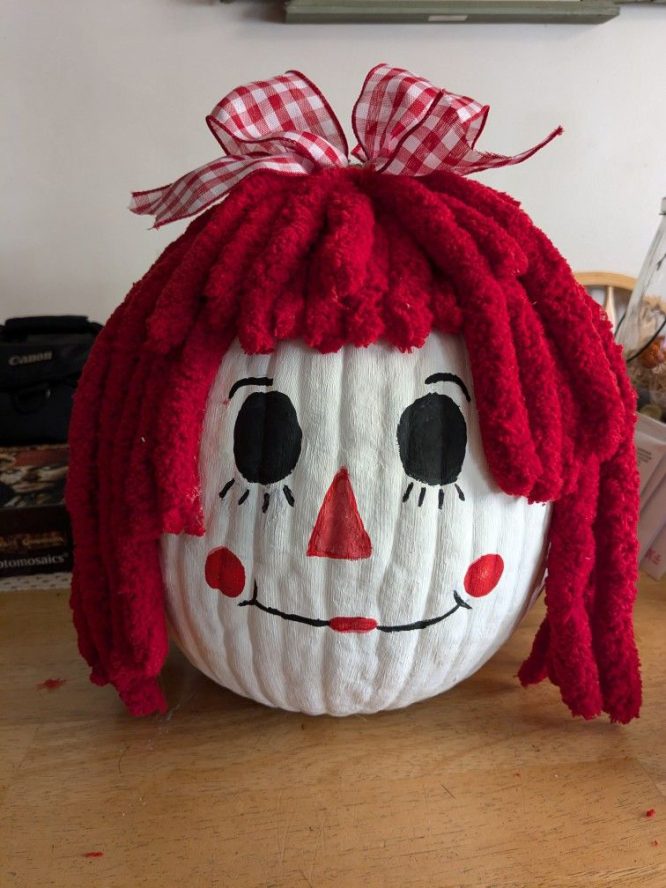
Chunky yarn turns a plain white pumpkin into the sweetest rag doll face.
Paint on big black eyes, a triangle nose, rosy cheeks, and a simple smile using acrylic paint. Keep the linework soft and rounded so the face stays friendly, not spooky.
For the hair, loop thick red yarn or chenille strips around the top of the pumpkin and secure with hot glue. A gingham ribbon bow tied on top finishes the whole look.
This one feels more country charm than Halloween scare, perfect if you want something sweeter for your porch. (📸 Courtesy Pinterest pin)
FAQs about No-Carve Pumpkin Ideas for Halloween
How do you decorate a pumpkin without carving it?
Paint, glue, fabric, and craft supplies are really all you need. Acrylic paint works for faces and patterns, Mod Podge is great for decoupage designs with paper or napkins, and hot glue holds on anything from felt to yarn to seed pods.
What kind of pumpkin should you use for no-carve crafts?
Both real and artificial pumpkins work well. Real pumpkins are budget-friendly and easy to find in fall, while faux foam pumpkins last for years and can be reused every season, which makes them worth it if you plan to decorate again next year.
How long do no-carve pumpkins last?
Painted or decorated real pumpkins typically last several weeks before they start to soften, especially if kept out of direct sun and rain. Faux pumpkins hold their design indefinitely, so they’re a solid choice for anyone wanting decor that survives storage and comes back out next Halloween.
Can kids help with no-carve pumpkin decorating?
Absolutely, that’s one of the best parts. Handprint designs, stickers, felt shapes, and paint pens are all kid-friendly and skip the sharp tools completely, so little ones can get just as involved as adults without any safety worries.