
Are your craft supplies playing hide-and-seek with your creative mojo?
Do you find yourself lost in a labyrinth of ribbons, buried under an avalanche of beads, or on a never-ending quest for that elusive paintbrush?
Then this blog post is for you. Because I’ve got some ideas that will make your creative heart leap with joy!
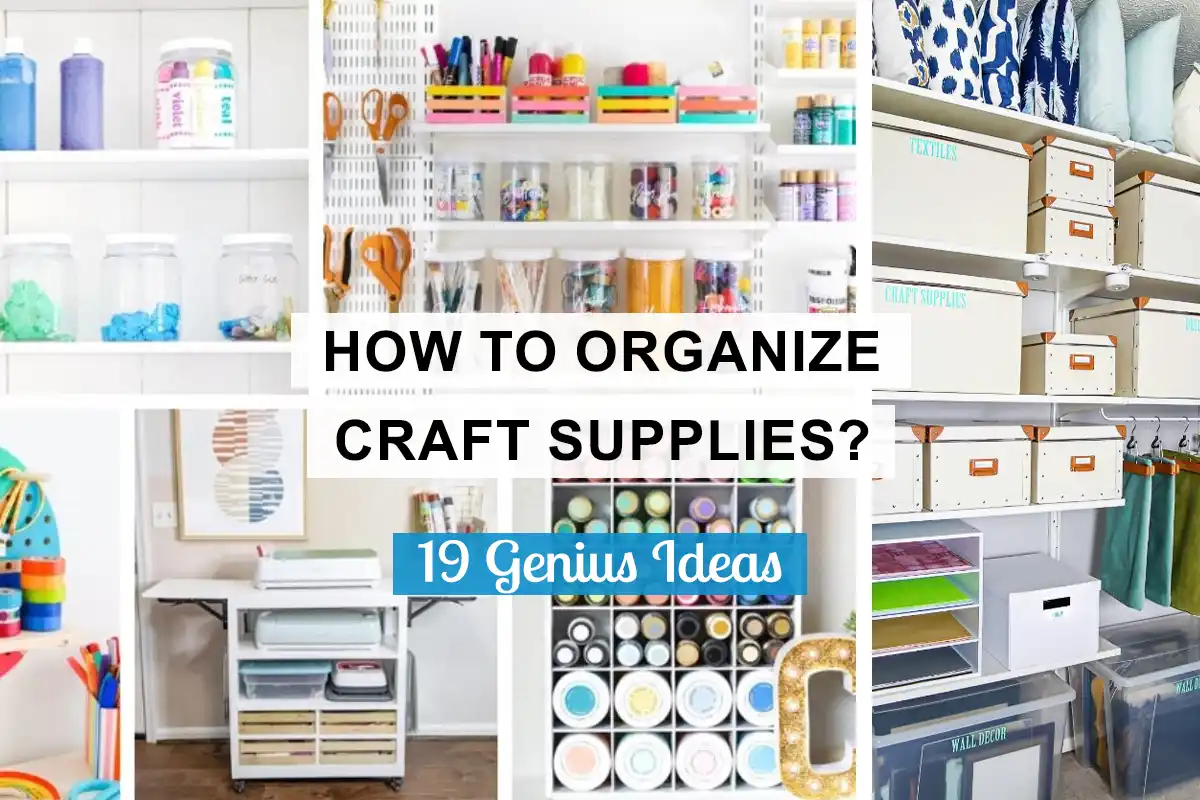
Today, I’m diving deep into the world of organization and revealing 19 genius ways to organize craft supplies that will revolutionize your crafting experience.
Whether you have a dedicated craft room or a tiny corner in your home, these brilliant ideas will help you tame the chaos and transform your space into a haven of creativity.
Why Is It Important to Organize Craft Supplies?
Organizing craft supplies is incredibly important, and let me tell you why based on personal experiences.
When I first started crafting, I had all my materials scattered all over the place.
It was chaotic, and I wasted so much time searching for specific items.
Trust me, nothing kills the creative flow faster than spending precious minutes or even hours hunting for that one paintbrush or elusive spool of thread.
Organizing craft supplies is crucial for several reasons.
Firstly, it saves you time and frustration. When everything is in its rightful place, you can easily find the materials you need, without wasting precious minutes searching for them. This allows you to jump right into your projects and maintain a smooth creative flow.
Secondly, organizing your craft supplies helps prolong their lifespan. Proper storage prevents damage or loss of materials. Delicate items like papers or fabrics are protected from creasing or staining, while tools stay sharp and rust-free. By taking care of your supplies, you ensure they are always in good condition and ready to use when inspiration strikes.
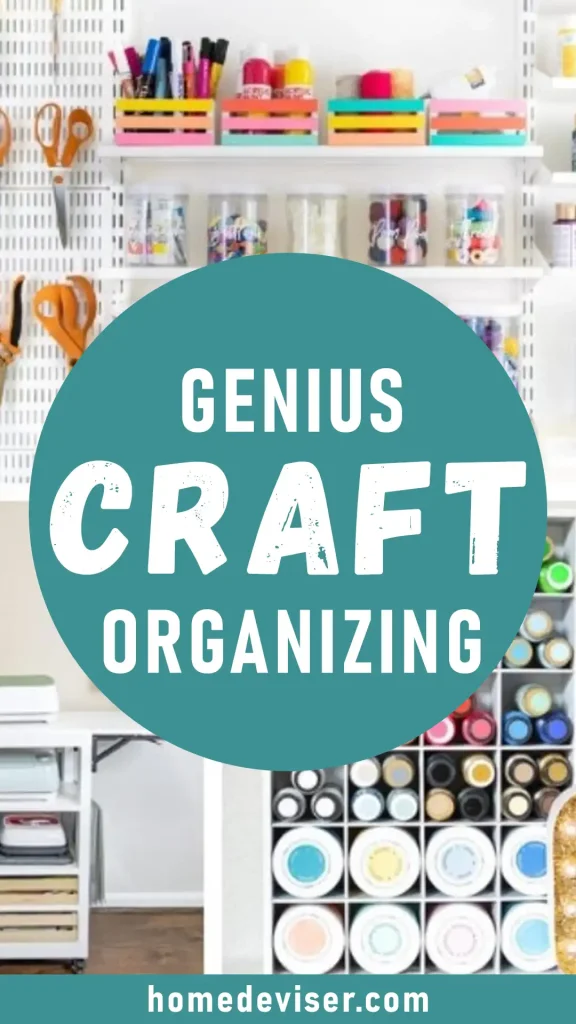
19 Creative Craft Organization Ideas
Alright, let’s explore some practical tips and strategies to help you organize your craft supplies effectively.
1. Use Clear Plastic Containers With Lids
Clear plastic containers allow you to easily see what’s inside without having to open them. Opt for containers with lids to keep your supplies protected from dust, moisture, and potential damage. Consider using containers of various sizes to accommodate different types of supplies.
2. Label Everything Clearly
Clear and accurate labeling is essential for maintaining an organized craft space. Whether you prefer using a label maker, adhesive labels, or masking tape, make sure to label each container, bin, or drawer with the specific contents. This will save you time and effort when searching for specific materials or tools.
3. Utilize a Pegboard for Hanging Tools
Pegboards are a versatile and customizable solution for storing and organizing various tools. Mount a pegboard on a wall within easy reach of your crafting area and use hooks or pegs to hang tools such as scissors, rulers, cutting mats, and paintbrushes.
4. Sort Items by Color or Theme
Sorting your craft supplies by color or theme adds both functionality and visual appeal to your organization. For example, you can group similar colored beads, fabrics, or papers together. Alternatively, you can organize supplies based on project themes, such as scrapbooking, knitting, or painting. This method allows for easy identification and selection of materials for specific projects.
5. Store Small Items in Containers or Trays
Small craft supplies like buttons, beads, sequins, or embroidery floss tend to get easily lost or tangled if not properly organized. Invest in compartmentalized containers or trays with adjustable dividers to keep these items separate and organized. This will make finding and accessing what you need much easier without rummaging through a mess.
6. Create a Dedicated Crafting Space
If you have the space, designate a specific area for your crafting activities. Install shelves on the walls to hold storage bins or baskets for larger supplies, keeping them within easy reach while maintaining a tidy workspace.
7. Get a Rolling Cart for Easy Access and Mobility
A rolling cart is a practical solution for crafters who like to work in different areas or need to keep their supplies mobile. Choose a cart with multiple tiers or drawers to accommodate different types of materials. Use the cart to store frequently used tools, adhesives, and other essentials, and easily move it around your workspace as needed.
8. Hang a Shoe Organizer for Supplies on a Door
The back of a door often goes unused, but it can provide valuable storage space. Hang a clear plastic shoe organizer with multiple pockets on the door, and use it to store a variety of craft supplies like pens, markers, scissors, glue sticks, and small embellishments. The transparent pockets make it easy to locate and access your supplies.
9. Store Yarn or Thread in Clear Jars or Bins
Yarn or thread can easily become tangled or unruly if not properly stored. Keep them organized by placing them in clear jars or bins. This way, you can see the colors and textures at a glance and prevent them from getting knotted.
10. Utilize a File Organizer for Paper and Patterns
If you work with a lot of paper, patterns, or templates, a hanging file organizer can be a lifesaver. Use it to store your paper neatly and categorize patterns based on type or project. This method ensures that your papers and patterns remain flat, easily accessible, and protected from bending or creasing.
11. Use Magnets or Magnetic Strips for Metal Tools
Metal tools, paper clips, brads, and other small metal embellishments can easily get lost in the chaos. Install a magnetic board or magnetic strips on a wall or inside a drawer. Attach your metal tools and embellishments to the board or strips, keeping them visible, organized, and within reach.
12. Repurpose Old Jars or Cans
Instead of throwing away common household items like empty jars or cans, recycling and repurposing them can be an economical way to organize your craft supplies. Use them to store paintbrushes, markers, pens, or other long and slender tools. Clean them thoroughly, decorate if desired, and place your tools inside for an organized and eco-friendly solution.
13. Install a Peg Rail for Ribbon and Tape
If you have a collection of ribbons or washi tapes, a peg rail is an excellent way to keep them organized and easily accessible. Hang the spools on the pegs, and you can quickly unroll and cut the desired length for your projects.
14. Use a Tiered Organizer for Beads and Buttons
A tiered organizer, often used for spices, is a great option for storing small craft embellishments like beads, buttons, or sequins. Each tier can hold a different type of embellishment, making it easy to find and select the right ones for your project.
15. Create Fabric Storage With Labeled Bins or Shelves
Fabric can take up a significant amount of space, so it’s important to have a designated area for it. Use labeled bins or shelves to store folded fabric pieces, ensuring they remain wrinkle-free and easy to locate.
16. Store Fabric Scraps in Clear, Labeled Bags or Bins
Fabric scraps can accumulate quickly, so it’s essential to have a system for organizing them. Clear, labeled bags or bins are ideal for storing fabric scraps by color, size, or project, allowing you to easily find the piece you need without digging through a messy pile.
17. Hang a Corkboard or Wire Grid for Inspiration
Keep your creative ideas, inspiration, and important notes visible by hanging a corkboard or wire grid in your craft area. Pin or clip magazine clippings, sketches, reference photos, or project outline to the board or grid. This provides a visual reminder and quick reference for your ongoing and upcoming projects.
18. Keep Essentials in a Desktop Organizer
A desktop organizer is a practical solution for keeping your most-used craft supplies within easy reach. Use it to store scissors, pens, pencils, rulers, and other essentials, ensuring they’re readily available whenever you need them.
19. Repurpose Bookshelf With Bins for Larger Items
Don’t overlook the potential of an old bookshelf as a storage solution. Repurpose it by adding bins or baskets to the shelves, and use them to store larger supplies like fabric rolls, canvases, painting easels, or bulky tools, keeping your crafting area tidy and functional.
Final Thoughts
And there you have it, my friend! We’ve explored 19 genius ways to organize your craft supplies, and I hope you’ve found some ideas that resonate with you.
Remember, an organized crafting space is a game-changer. It saves you time, reduces stress, and enhances your creative process.
So don’t be afraid to try out different methods and find what works best for you.
The key is to create a system that suits your crafting style and helps you stay organized in the long run.
Trust me, the satisfaction of having a well-organized craft space will be worth it.
Get ready to unleash your creativity, knowing that everything is in its place and ready for your artistic endeavors.
Happy crafting, and may your organized craft space bring you endless inspiration and joy!